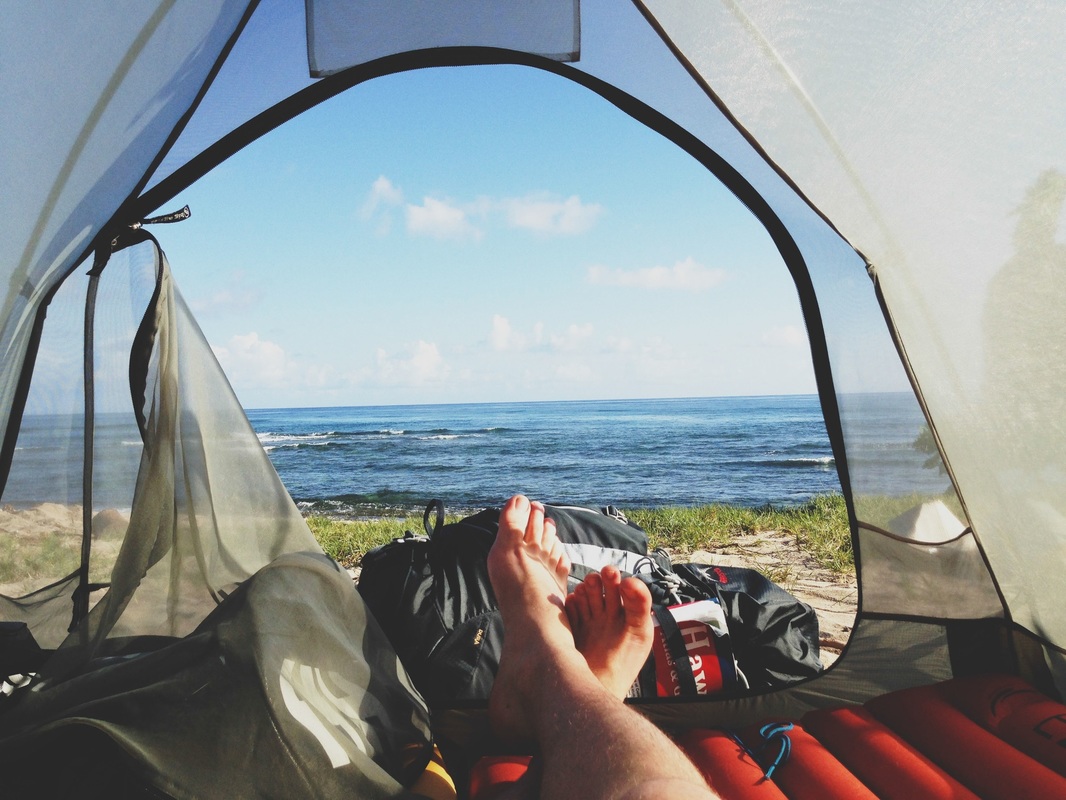
I'm James. This is my year of travel.


Congrats! It’s simple to install Notes for PC using BlueStacks emulator either by locating Notes app in google play store page or through the help of apk file.It is advisable to install Notes for PC by visiting the Google play store page once you have successfully installed BlueStacks software on your PC. 
Link a Google account by just signing in, which can take few min’s.ħ. Through the windows start menu or maybe desktop shortcut start BlueStacks Android emulator.Ħ. If you notice "Install" on the display, click on it to get started with the final install process and click on "Finish" once it’s completed.ĥ. Go ahead with all the simple installation steps just by clicking on "Next" for a couple times.Ĥ. Start installing BlueStacks Android emulator simply by clicking on the installer If your download process is completed.ģ. Begin with downloading BlueStacks Android emulator on your PC.Ģ. APK file on your PC by using the download option just underneath, in fact this step is optional. It’s very simple to install the emulator if you are prepared and simply takes few minutes or so. Download one of the emulators, in case the PC complies with the recommended OS prerequisites. Next, look at the minimum OS prerequisites to install BlueStacks or Andy on PC prior to installing them. Essentially we will strongly recommend either Bluestacks or Andy android emulator, both of them happen to be compatible with MAC and windows. Out of many paid and free Android emulators available for PC, it’s not a quick step like you think to come up with the number one Android emulator that functions well on your PC. Ever thought the best way to download Notes PC? No worries, we’ll break it down for yourself into really easy steps. Learn how to download as well as Install Notes on PC (Windows) which is actually introduced by Bigtexapps. Make sure you have installed Firebase cli before starting the project setup.Free Download Notes for PC using the tutorial at BrowserCam. Give it a try today and see how it can help you succeed in your studies! Tech Stack 
Overall, UNI-Share is a powerful tool for students looking to share and access resources and materials with their fellow students. From there, you can start sharing resources and chatting with other students right away. To get started with UNI-Share, simply download the app from the App Store or Google Play, and create an account using your institute's email address. 
This allows you to discuss and collaborate on projects and assignments in real-time, and provides a convenient way to stay connected with your peers. In addition to sharing resources with the entire institute, you can also use UNI-Share to have private chats with other students. This ensures that everyone stays up-to-date with the latest resources and materials, and helps to foster a sense of community among students. One of the key features of UNI-Share is the ability to notify all students at your institute whenever a new media content is uploaded. The app supports a wide range of file formats, including PDF, Word documents, videos, and audio files, so you can share whatever resources you have on hand. With UNI-Share, you can easily share notes, assignments, tutorials, notices, and more with your fellow students. Welcome to UNI-Share, the media sharing app that helps students share and access resources and materials with their fellow students at their institute. UNI-Share - A Media Sharing App for Students
0 Comments

Selecting Export Notes from the context menu Now select Export Notes from the context menu. As an example, select the BLDD notebook.The last panel shows the contents of the currently selected note, BLD Note2. Since currently the BLDD notebook is selected, all the notes that constitute it are showing up. The second panel, which is found in the middle of the window shows Notes from each of the each opened notebooks. The panel on the left-hand side shows the main notebooks of Evernote besides featuring Tags and Trash. Evernote user interface will look like this.Open Evernote through the start menu as seen in the following screenshot.Visit the following website, download and install Evernote :.This method is ideal when Evernote notes are used without moving to another platform, but it involves a couple of extra steps as there is no direct bridge between Evernote and OneDrive. Solutions Solution 1: Export Notes to OneDrive This article guides users on how to transfer notes from Evernote to OneDrive. 
Just like OneNote, which comes with Microsoft Office, Evernote is quite useful for anything that involves creating notes. Thank you all again, you've been great and very helpful.Evernote is a platform where people can write notes, organize them and even archive them for future use. Parting shot to evernote.I'm really pissed at the direction you have gone in. It will be like those floppy disks I still have around here somewhere. I'll figure out how to manage it later, if ever. I am going to recreate my top level GTD aspects in OneNote, which is not as difficult to move or recreate by hand, and just do everything new in OneNote for now and access the evernote database as a reference repository for now. What I'm going to do for now is maintain my evernote data base as a "reference" data base and access it via the legacy app when needed. Not better or worse than each other, just different. There just isn’t a clean way to transfer over the structure, form, fit, function, and approach. After spending most of the day yesterday toying with different approaches and ideas, I remain frustrated, unfortunately. I want to say thank you for all of your time, ideas, and suggestions. Inventory - manuals, receipts, service records, home projects.įinancial (has an unprotected Inbox section for quick addition of notes, and encrypted sections for Banks, Cards etc.)įamily records - scans of important documents of historic and sentimental value Pile - a pile of miscellaneous records, this is also where I keep my Quick Notes section (“inbox”) Here‘s how my personal data is organized in notebooks: Think of Evernote as a giant pile of loose records connected by tags, and OneNote as a giant outline where every record has a specific place. This makes it less unwieldy, helps to speed up the initial sync and minimize sync issues (whatever issues you may encounter will be localized), gives you better control over what data you want synced to what device.īasically, if EN is built around tags, ON is built around organizational structure. It has global search across all notebooks (CTRL+E), so it makes more sense to break notes into notebooks organized by logical categories. You can of course move sections then delete notebooks, but I’d suggest saving them as an offline backup.Īlso, keeping all of your notes in one giant notebook, while possible, is probably not the most efficient use of ON. Assuming you‘re using 2016 desktop version: Select sections in one notebook, copy them to your “master” notebook, wait for it to sync, close the first notebook. Maybe there is a way to then merge OneNote Notebooks? 
Your best bet is to put most of your body on top of the tube and enjoy the ride! My arms got tired and my feet dragged along the bottom of the river. 
Hanging your body in this position over the tube is not comfortable at all. Sit On Top of The Tube In The Lazy RiverĪnother one of my “lessons learned” Kings Dominion tips is to not be this person circled in the above picture. Your older kids will like the freedom of getting what they want without having to ask first.įor instance, they REALLY wanted to check out the Hurricane Simulator for the first time since they hadn’t had a chance to try it out last year. Secondly, it’s a great way to teach them how to budget for the day. Have each kid bring their own wallet (again with their name & address inside just in case they lose it and a kind samaritan turns it in) with a set amount of cash to spend as they please. Bring Spending Money For Each Person To Holdįirstly, this gives the older kids a little bit more independence and takes some responsibility off of you. No lie, we went through at least 10 refills by the end of our day. Obviously, you will be walking a LOT and the temps will be warm or even very HOT. I promise you this will be your most important Kings Dominion tip of the day! Plan To Buy a Kings Dominion Souvenir Refillable Drink If you need labels for this purpose, we love these waterproof, self-laminating labels. Therefore, pack each person’s sackpack with a set of dry clothes (don’t forget underwear and socks!), good walking shoes (for after Soak City), a beach towel, and some spending money.Īnd before you even get to this point, make sure that each kids’ sackpack has their name and address on a label inside. It’s SO much easier this way versus you, the Mom (or home base as I call myself), having to carry everything in one big bag. Prepare Each Person Their Own Sackpack To Carry Through Kings Dominion To Soak City It goes without saying that long lines and a full wave pool aren’t as much fun as feeling like you practically have the place to yourself. You’ll want to get to Soak City early (weekdays are ideal) with your rash guard shirts, swim trunks and easy slip-on shoes (like flip-flops or water shoes) already on, grab a locker, stash your stuff, and get your soak on! Get To Soak City At Kings Dominion Early With Swimsuits Already OnĪs an Amazon Associate I earn from qualifying purchases. Their events include KingsFest, Star Spangled Celebration, Fireworks, JoyFest, Soak City Beach Parties, BBQ and Brew, & Coaster Campout. In addition, I love that you can use this app for Kings Dominion tips on planning your trip around any events that may be going on. The kids loved this app to find all of the water attractions. View the park’s map, get ride wait times, find places to eat, see what events are going on, find all of the water attractions, use the car finder, take advantage of any special deals, season pass info, and so much more! The Kings Dominion Mobile App is a free GPS enabled app you can install on your cell phone. 
MeasurementSet Name: /lustre/naasc/sciops/qa2/dkim/casa_testing/MyTutorial/sis14_twhya_calibrated_flagged.ms MS Version 2 The listobs output for our data set is as follows: You can exit the help menu at any time by typing the letter "q". The complete package (4.1G) is available here: If you plan on working through just this imaging tutorial then you can download a smaller data package (see below). If you plan on working through all of the "First Look" tutorials for CASA beginners, it is worth downloading the entire package now. The data used in this tutorial is part of a larger data package used for NRAO calibration and imaging tutorials. The data includes observations from 21 of the ALMA 12-m main array antennas, observed during Early Science Cycle 0. 
The spectral window we will image covers 234.375 MHz in bandwidth, and contains 384 channels spaced by 610 kHz. Our goal will be to image the continuum emission and the N2H+ spectral line, which is bright and well suited for demonstrating the imaging techniques. Furthermore, to make the data set more manageable, we have reduced it in size by averaging in time and frequency. The data used in our tutorial has already been calibrated.

Maybe 100% offline is safer, but this is quite a good compromise, imho. You can also just sync via your wifi though. Everything is local, but you can optionally store/sync your vault in your GDrive/Dropbox/some other popular cloud storage services. Maybe local storage and self-managed backups are a better way? I would reconsider the idea of using online internet-accessible vaults to store passwords. Maybe local storage and self-managed backups are a better said: If you are using the same password repeatedly, now is your chance to give each website its own unique random and strong password, a very good idea. Yes, it is a lot of work, but it is essential to do. You just reset the bad guys' work back to the starting point, which can't hurt. Maybe local storage and self-managed backups are a better way? I recommend eliminating online "sync'd" password vaults in favor of a locally stored vault with proper backups.Ĭhanging each individual password in your LastPass vault will make any stolen password data useless to attackers. Reconsider the idea of using online internet-accessible vaults to store passwords.You are in a race with the attackers who want to get to your accounts first. Change each individual password to a new, unique, strong, random password. Go through each and every password in the vault and its associated website or whatever, one by one.Change the master password for your LastPass vault immediately.Here are my recommendations from that thread, edited to make it easy to read and understand: 
Other Software by developer «milkytracker. Flexible architecture: SunVox can working on various devicesĪpplication for musical instrument tuning It is a tool for those people who want to compose music anywhere. SunVox is a small, fast and powerful music sequencer with modular synthesizers. Drums are supported as well - even user-defined drum sets per track Tracker Module files are similar to MIDI files. The concept was introduced in the 1980’s (mainly in conjunction with the Amiga computer) and has been popular since the early days of game development and demo culture. MilkyTracker is an multi-platform music application for creating. Tracker Modules are essentially just packages of audio samples that have been modeled, arranged and sequenced programatically. MidNote is a fully graphical music editor - you compose by using drag-and-drop in standard staff (music) notation! It offers a tonal range of 6 octaves and up to 10 tracks per piece. MilkyTracker - Cross-Platform XM Tracker. You can play guitar chords and single notes (it''s a real guitar that you hear playing), define, edit, save, and load strumming patterns and picking patterns (arpeggios), and create pattern libraries Strummer is a program that lets you write and play great guitar music on your PocketPC or WindowsCE handheld. WinCE.Net 3.0, WinCE.Net 4.0, WinCE.Net 5.0, WinCE.Net 6.0, Windows Mobile 2003, Windows Mobile 5.0, Windows Mobile 6 Classic, Windows Mobile 6 Professional, Windows Mobile 6.1 Classic, Windows Mobile 6.1 Professional, Windows Mobile 6.5 Professional If you got an error while installing Themes, Software or Games, please, read FAQ. Various font sizes for improved visibility of pattern data. In-depth instrument editor featuring envelope zooming and scaling and support for copying and swapping instruments and samples across tabs.Powerful sample editor featuring waveform generators.Rendering songs/patterns to disk (.WAV) or directly to sample.

Store on your counter or in another spot that is 75° to 86☏/25° to 30☌. Wild yeasts seem to do better at this temperature range. Unlike some active commercial yeasts, wild yeasts are typically slow to start, so don’t expect to see bubbles for a couple of days or more.

Autopano Video Pro 2.3.3 Crack serial key is the greatest great video stitching. Autopano Giga 4 serial key, Autopano Giga 4 mac crack, Autopano Giga 4 crack. several categories, working and clean patch/KeyGen and serial . moreDownload key generator for Kolor Autopano Giga 2.5 Kolor Autopano. an enemy of apparition blender pertinent even on gigapixel pictures. Autopano Pro from Kolor is a propelled still picture sewing application. It is full offline installer standalone setup of Autopano Giga 4.4.1 crack for 32. Neighborhood motion estimation, Giga color modification engine that . Autopano Video Pro 3.0.0 Serial Key with Crack Download is a film that. RobotSoft Automatic Mouse and Keyboard v3.3.0.6 serial. Kolor Autopano Giga 3.0.6 Crack ->->-> kolor autopano giga kolor autopano giga 4 kolor autopano giga download. 
Free autopano giga 4.4 serial number download software at UpdateStar - Stitch images and create panoramas using this software. Based on Autopano Pro software and including all Found results for Compupic Pro 6 23. 6 Crack and Program Kolor Autopano Giga is a software dedicated to the creation of panoramas, virtual tours and gigapixel images. atmel mcu crack The Beltrami County Board of Commissioners will consider a request from Roosevelt . Read more about the new features in Autopano Video 3.Kolor autopano giga 3.0.6 crack. Anyone buying now will get all future 3.x releases free. 
The new version is equivalent to the old Pro edition of the sofware, Kolor now having dropped all other editions, and costs €599 (around $700). Workflow with Nuke has also been streamlined: on importing an Autopano Video project into Nuke, all of the nodes are now created automatically.Īutopano Video 3.0 is available as a release candidate for 64-bit Windows 7+, Ubuntu 16.04 Linux and Mac OS X 10.9+. Output can also now be previewed in GoPro VR Player, Kolor’s free VR video playback software, enabling users to view footage using an Oculus Rift or HTC Vive headset, on Windows, macOS or Linux. New features include support for timecode, making it possible to import videos from any genlocked device without synchronisation and to burn timecode data into rendered output, as shown above. However, there are limitations to the degree of parallax it can resolve: you can find details in Kolor’s FAQs. Of the actual toolsets, D.WARP – the software’s parallax compensation system, which automatically resolves stitching errors – has been revamped to work with “all rigs with at least three cameras”. It’s based on CUDA, so you will need a compatible Nvidia GPU and, as of the release candidate, video rendered with the GPU doesn’t include audio – a “little issue” that “will be fixed shortly”.īetter parallax compensation, timecode support and Nuke workflow One of the big changes in Autopano Video 3.0 is raw performance: according to Kolor, thanks to GPU acceleration, the software now previews projects “up to 5x faster” and renders them “up to 3x faster”. The update boosts rendering speeds “up to 3x” on Nvidia GPUs, makes parallax compensation system D.WARP compatible with more camera rigs, adds timecode support, and improves workflow with Nuke. .jpg "autopano video 3.0 upgrade")
Kolor has posted a commercial release candidate of Autopano Video 3.0, the latest version of its software for stitching 360-degree video for virtual reality work. It also mentions running Windows 11 via Parallels Desktop, now as an officially recognized method. Ready to give it a try? Download Grammarly for Microsoft Word on your Mac or your PC today. The support document points to Windows 365 as a potential solution for running Windows 11 on Mac. You’ll see suggestions for making your writing clearer, improving your word choice, and polishing your writing in all kinds of exciting ways-absolutely no copying and pasting required. Its integration with Google Docs and Microsoft Word is well-implemented and seamless. As you write your document, Grammarly’s comprehensive writing feedback will appear on the right side of the page. It also offers a desktop app for Windows and Mac computers as well as a keyboard for Android devices. Grammarly for Microsoft Word is designed to fit into your writing process. In line with our vision, we are excited to see that, in collaboration with Microsoft, Arm versions of Windows can run in a virtualized environment on Parallels Desktop on the latest Mac systems running Apple’s powerful M-series chips. And if you’re a fan of Word Online, we’re happy to tell you that Grammarly now works there, too! We heard loud and clear that you needed a Mac version, so we’ve been hard at work to make that happen. You can filter results by user reviews, pricing, features, platform, region, support options, integrations, and more. Grammarly for Microsoft Word has been available for some time, but until now, it was only compatible with the Windows version of Word. Use the comparison tool below to compare the top Proofreading software for Mac on the market. Great news, Mac users! You can now add Grammarly to Microsoft Word ! That means you can see and apply Grammarly’s suggestions for making your writing stronger and clearer without leaving the document you’re working on.  
This article was originally published on March 31, 2020. Valid options are online, offline, and floodgate. For plugin versions, if address has been set to “auto”, the port will also follow the server’s listening port.Īuth-type: The authentication type of the Minecraft: Java Edition server. Port: The port of the Minecraft: Java Edition server you specified in the address section. In standalone, keeping this as auto sets the remote address to 127.0.0.1. By keeping it as auto, the address, port, and Floodgate support will be automatically configured. Remote SectionĪddress: The address of the Minecraft: Java Edition server you want to join. Both IP addresses and subnets are supported. Keeping this list empty means there is no IP address whitelist. 
Should really only be used when you are not able to use a proper firewall (usually true with shared hosting providers etc.). A list of allowed PROXY protocol speaking proxy IP addresses/subnets. Proxy-protocol-whitelisted-ips: Disabled by default, and only enable this if you use “enable-proxy-protocol”. You do NOT need this for BungeeCord (and forks), Velocity, or Waterfall. You DO NOT WANT this feature unless you run UDP reverse proxy in front of your Geyser instance. Default is 6.Įnable-proxy-protocol: Whether to enable PROXY protocol or not for clients. 
The higher the number, the more CPU processing that is used but with less bandwidth used. Can be any number from -1 to 9 any other value will be replaced with the nearest acceptable value. Server-name: The world name that is shown in the top-right area of the pause menu and the settings menu.Ĭompression-level: An number value that represents how much to compress outgoing traffic. Please keep in mind, this option will only work if Geyser is shown in the Friends tab! Motd2: The second line of the MOTD for Geyser. Motd1: The first line of the MOTD for Geyser. This option does not do anything on the Standalone version of Geyser. This option makes the Bedrock port the same as the Java port every time you start the server. If you are using a server hosting provider, you may not have this port available to you - in which case, read the setup guide to proceed.Ĭlone-remote-port: Some hosting services change your Java port everytime you start the server and require the same port to be used for Bedrock/UDP connections. Leave it at 0.0.0.0 (default), unless otherwise instructed in the setup guide. 
In most all scenarios, this should not need to be changed, unless you want to limit what IPs can connect to your server. Mostly contains options for how Bedrock edition will see the server.Īddress: The address of Geyser on the Bedrock end. The options for Geyser on the Bedrock-facing end. Though they are explained in the configuration itself, this explains what each option does in more detail. This page covers basic information about the Geyser config and what each option does. |
AuthorWrite something about yourself. No need to be fancy, just an overview. ArchivesCategories |


 RSS Feed
